Sunday, February 24, 2013

Fuel Injection Issues (CIS Lines)

I've dealt with FI issues in my car since day one.  I'm sure I have a long way to go but I've made some strides in this area recently.  I found out only a very short time ago that a leading source on the remaining world market of CIS components (used in old Porsches, Mercedes, Ferraris & Deloreans amoung others) does business not 40 miles from me.  I've now become acquainted with said gentleman and happily soaking up his wealth of knowledge on getting fuel [properly] to my engine.

This is BAD
One, I had to get a new fuel pump to get the car running several years ago, in my own new 911 owner ignorance I used a 1/4" fuel line from the auto parts store for the 3' or so run from the pump to the filter in the engine bay......this is bad as we are supposed to have these super high pressure nylon lines there.


I learned from my visit how to make a wooden jig to aid in [properly] mounting the barbed end pieces.  I drilled in a block of wood, the bit I used was right at the same size as the line, then I cut that in half with a scroll saw.  The blade width makes that hole just a tiny bit smaller than the line.

Note that this was version 1.0, made of cedar IIRC.  It died in the creation of the first line (after seated).  Version 2.0 was made out of some 3/4" cabinet grade ply I had hanging around and is holding up very nicely.

None of this is rocket science, these lines seemed intimidating at first but as with most things after doing it once it's pretty simple.  I'm not ground breaking anything but I'm pleased with myself so you get to read about it (deal with it :D )


There was one line I had to attach to an existing coupler residing in the engine bay.  These grips are incredibly strong and hold fast with soft faces.  They made a nice portable vice and I was able to muscle in the coupler without issue.


So now I have nicely plumbed incoming and return fuel lines.

This shot also shows off my newly cleaned, painted engine bay and also my nice new sound mat.

Here is my marked up picture of the proper CIS line routing in case it actually helps someone else.


Ebay Engine Yoke update

I kinda already knew this but with this yoke truly and securely mounted to the bell housing there is no way you are going to mount the oil cooler, cross-over pipe or install the clutch.  None of this is a really big deal and can be done once it's off the stand but just so it's out there.....

Sunday, February 10, 2013

Panic Attacks & Hemmeriodal Tasks

Today I have begun "closing up" my motor.  I have timed, closed cams and installed, adjusted valves.  This was the 2nd of the tasks I was rather dreading and proved to be worthy of the angst.  I have found that while Wayne's book is remarkably comprehensive and an invaluable resource it still expects that one has at least a general understanding of how these things work and the ability to improvise or figure out a few things.

First the panic:

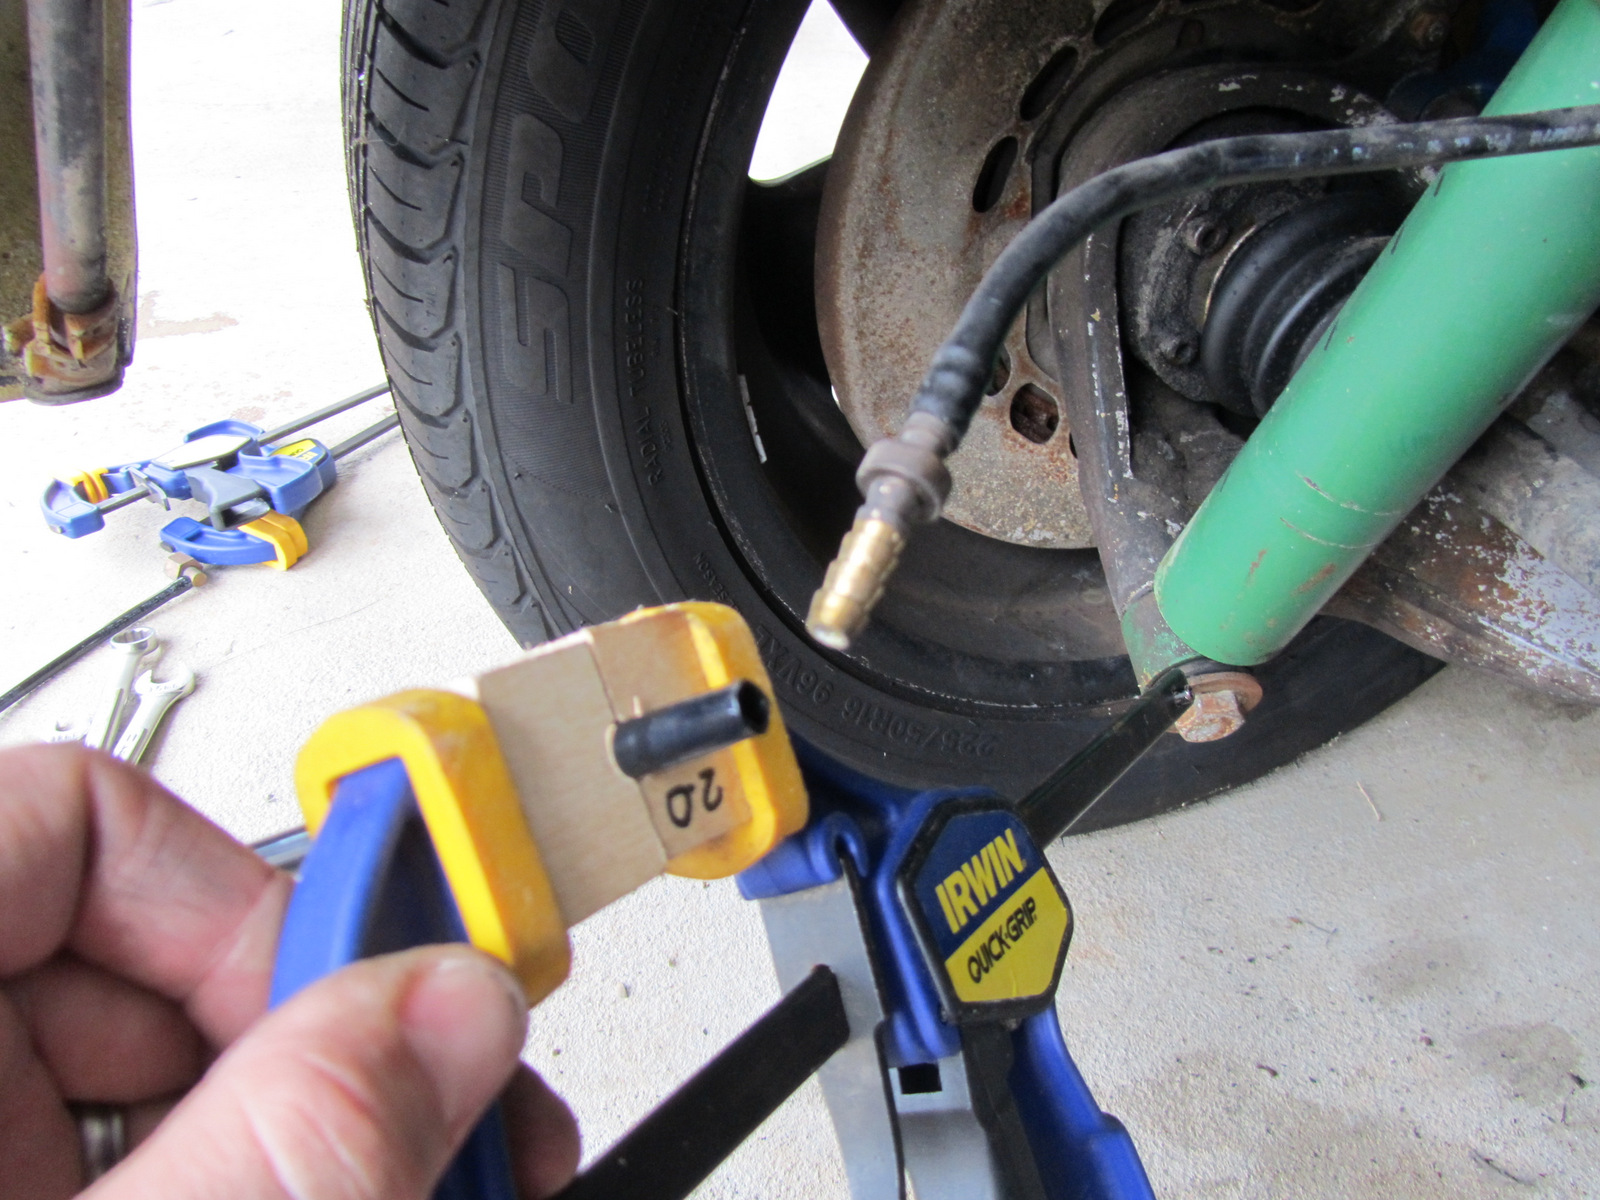
Note my rather ingenious application of "idler pulley tensioners".  You are supposed to keep a good deal of pressure on the chains via the idlers for setting the cam timing.  I don't have the mechanical tensioner for the right side and quickly discovered these clamps I use for woodwork w/ nice soft faces and very strong ratcheting give an excellent hold on the pulleys.

Either I missed it (even after re-reading a couple of times) or it really is glossed over but I had my cam nuts tightened down (but no pin installed yet) from the previous step.  When I started the timing procedure by getting the crank to TDC I found at about 800° my engine locked and wouldn't turn.  Turn back an equal amount and the same.  Here is where panic set in (seeing some forgotten step and a teardown coming).  But I fought it back and began to deduce why, quickly I found that the #4 intake rocker I'd just installed was making the valve hit the piston.

So I deduced one is supposed to have those nuts loose so the cams can spin irrespective of the crank position.  Duh! in retrospect but like I said this seems a bit of info taken for granted.

The rest of the timing went smoothly, following step by step, managing to keep the needle right in the middle of the setting range, but it was hardly a barrel of monkeys.  I'm sure this gets easier after the first go round as do many things but it's tedious and nerve racking that first.

Then came getting the [newly rebuilt] tensioners in place.  I don't have the P214 tool, but an internet search suggested several methods to get the job done without it.  I ended up with the big ass screwdriver method. 

That worked on the left side, but the right wasn't having it.  So I improvised.  For the record, faced with having to do this again I think I'll order the little piece of bent metal intended for this job or make one myself.  I got it done but I feared for putting too much stress on something getting there.


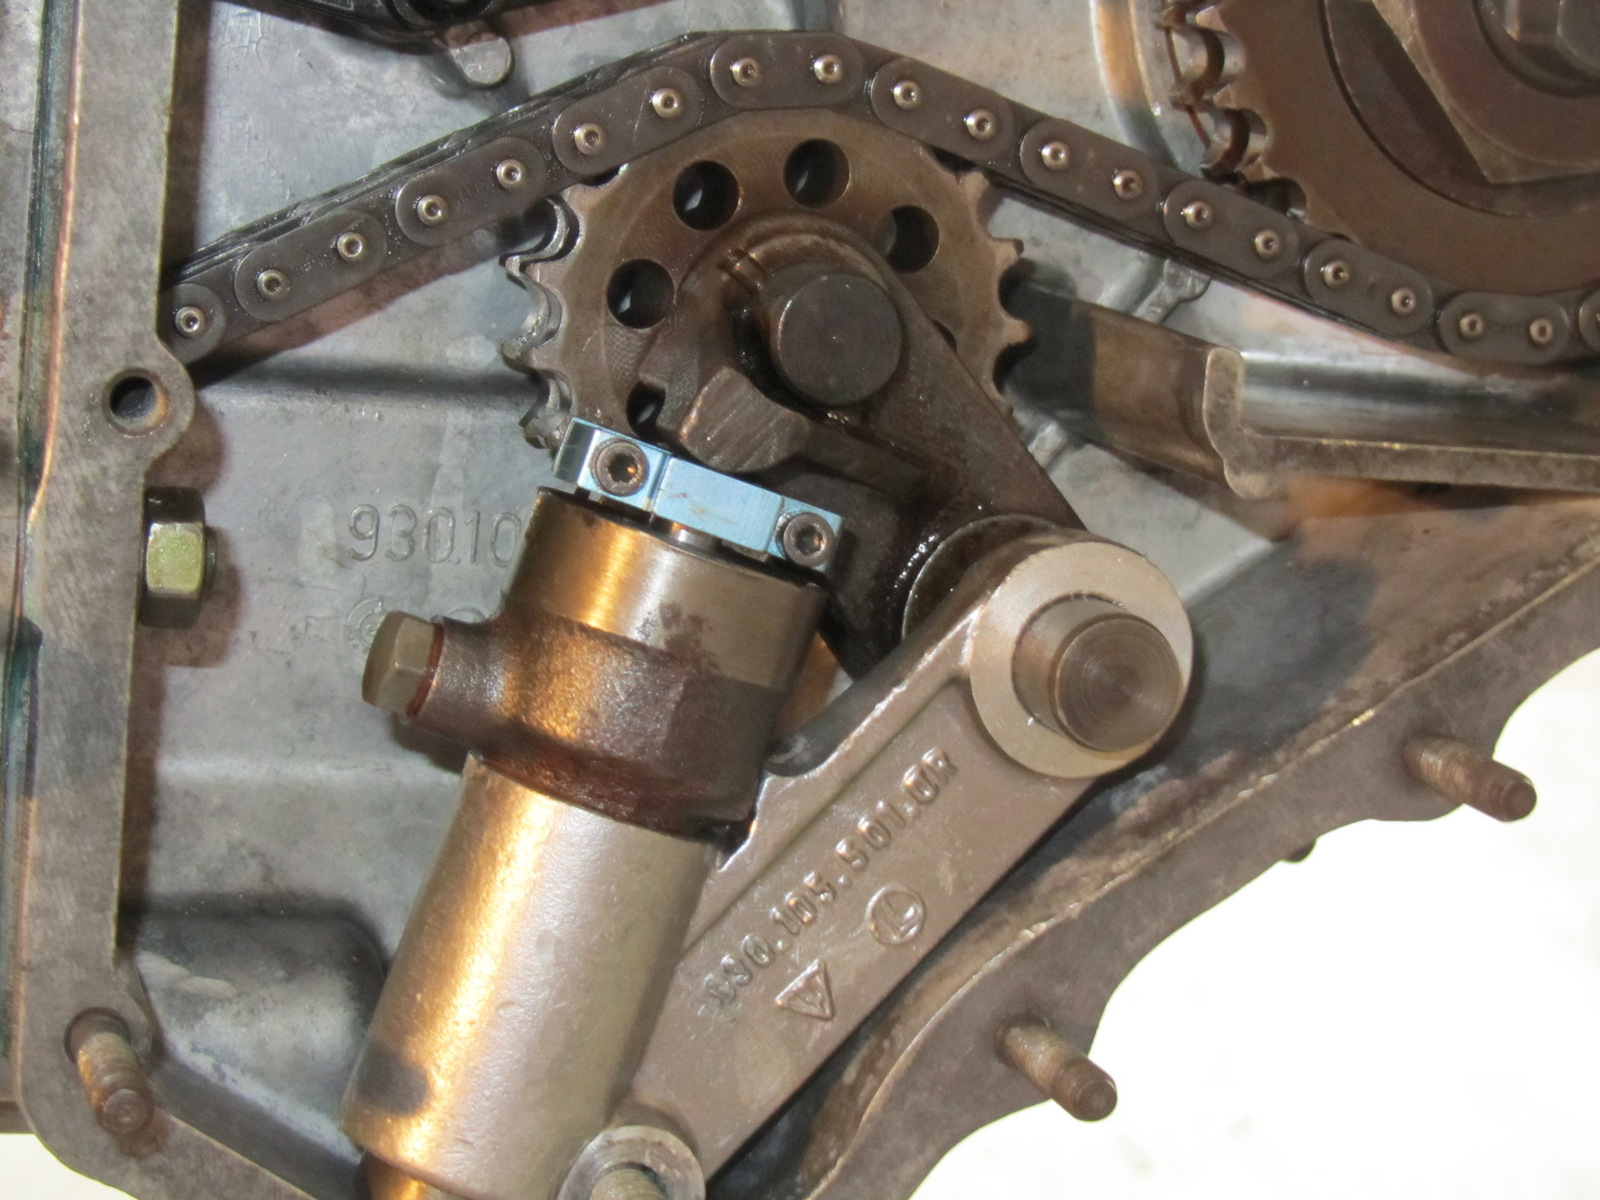
 I then installed the safety collars that probably saved my engine while my tensioners were out of oil.


I got the back of the engine all buttoned up and went on to install the rest of the rockers and meticulously adjust all the valves.  Now that chore, even though not particularly enjoyable IS much much easier with the engine on a stand as opposed to stuffed in the back of a fine piece of German engineering.

Feel like I'm actually getting somewhere!

Wednesday, February 6, 2013

Ups and Downs and the generosity of others

I continue to be surprised and heartened by the willingness of others to lend a hand with no expectation of compensation in this little Porsche community of ours.

I've now gotten a little farther having added my cam chain towers.  I had to make a judgement call due to finances not to spend the $800-1k that new Carrera Tensioners go for.  But when I pulled mine out of the bag I put them in 6 months ago and started to fiddle with them I noticed one could be compressed quite easily by hand and the other could not.  I posed this question to the community and was quickly enlightened that the easily compressed one was certainly not operating properly.


I put the picture above on my build thread on Pelican and I also sent a little side question about the same to our local Porsche whisperer.  He quickly diagnosed by the pictures that BOTH of my tensioners were woefully sagging but told me if I'd put them in the mail to him he'd rebuild them for me.  So off to him they went the next morning.  Here is where I found out what several of the little o-rings in my seal kit went to (nothing is noted anywhere just where each thing in these multiple plastic bags go)  apparently these ARE meant to be rebuilt.  I'd like to note that although every single resource reading up on a rebuilt says you just plain HAVE TO replace these babies with the later version I've now heard from several old hands that they are perfectly serviceable (and I'm going w/ that since I now have a nice new set and don't have all that extra $ laying around burning a hole in my pocket.

He sent me this little exploded diagram, I had tried briefly to disassemble them without getting too far and was all too happy to take him up on his offer to fix them for me.

And here is what I got back, quite a difference:


Current thoughts:  I'm somewhere between awe that my car seemed to run as well as it did, and relived that I think I did stave off impending disaster when I took her off the road.  My chain tensioners were both not doing their job, they had failure collars on but they were installed backwards so doing no good whatsoever.  I had 2 fully broken springs with fragments roaming around the case, I kinda assume there were other springs [that are now all new] that were sagging and ready to pop.  I had 1 valve not seating properly and all my exhaust guides were worn.  And I haven't gotten back there yet but my airbox has a huge crack in it (no wonder I've fought so many FI tuning issues).  

I'm getting closer, still need to step it up as there is a show in late March I'd like to be driving this wonderful beast to.


Tuesday, January 22, 2013

Everybody likes a little head

What?  You thought I meant... Nooo, I was talking about CYLINDER HEADs you sick B@stards!  I am slowly getting somewhere, I've been ultra fastidious (per all recommendations) in my workspace and each part that gets put together, making sure to wipe my work surface down regularly and each part gets clean wiped before assembly.  I've covered everything with some thick plastic each time I've left it at the end of a work session. 
I found out why it's suggested you cover over the open parts during piston->rod assembly first hand, had at least 2 or 3 of the snap rings go flying off that would have landed right inside the case, Wayne doesn't seem to suggest much in his book that doesn't have a good purpose.
Here is the right side complete.  I spent some time cleaning up wire wheeling and re-painting the cylinder cooling tin even though I know it won't see too much of the light of day, just seemed the right thing to do.


Presenting my clean and lovingly assembled long block as of this weekend.  Cam towers are next

Here's a shot of the parts I got back from the machinist, 1 out of spec valve (wasn't seating properly) all the exhaust valve guides (3 or 4 were worn out of spec) and all the valve springs.  Obviously the 2 on the left were broken, the rest replaced as I figured how far behind could the others be and I don't want to do this again soon!

Wednesday, January 9, 2013

The dead of winter

My sad little plaything sits, cold and dusty.  I feel a little twinge of guilt each morning I glance over as I plop down in the thoroughly modern yet completely boring Asian daily workhorse.  But her rear-end is up in the air and her engine sits, looking like an exploded parts diagram, closer to the wrong end than the right.

I have succumbed much too often to the cold, gray gloom which produces no motivation for even the things I want to do.  I received a shot in the arm yesterday in the form of fully rehabilitated three-liter combustion apparatus from the metal magician.  I shall strive to finish what I started [much] sooner than later and rediscover my Cheshire (or perhaps defecate consuming?) grin which makes my commute oh so much more enjoyable.

Sunday, December 9, 2012

Forward progress....

 Today was what felt like actual, real progress toward a running engine.  I got over a hump I'd been on for several weeks due to schedule, holidays & apprehension of a timed step to seal up the case which will forevermore affect my garage floor.


  It went surprisingly well, I'd digested a dozen forum threads and read (and re-read) the engine manual several times so I'm hoping I did it right.  I heeded the warnings of clean clean clean, I laid out all my bolts/washers/nuts, sockets & torque wrenches (w/ pre-set torque values) all in order so I could proceed quickly without stopping.

I made the rod & chain supports out of $5 worth of strip aluminum from the Depot, worked quite nicely.
 And finally I get to see again a mated case.

Just a little note, as opposed to the way I showed my engine mounted to the ebay yoke when I first mounted it I mounted it flush against the bell housing this time (as I think is intended) .  I will of course have to take the engine off the stand to attach the oil cooler but I think this is a whole lot more secure until I get to that point and I'm hoping I can just save that and the cross pipe till the end and just mount them before the install.  I shall report as I learn more.
And the project is put to bed for the night, trying to be careful to make sure I keep it all wrapped up since I started the actual reassembly so as not to introduce garage dust into these elements I've worked so hard to get clean.